
a mastering plugin in C++, from DSP to interface
An audio mastering plugin built in C++/JUCE, combining custom DSP, saturation design, oversampling, preset management, DAW validation, and a polished hardware-inspired interface.
why i built it
Music production has never been a cheap hobby. DAWs already cost a decent amount, and the plugins that actually help with production and mixing can get expensive fast. At some point I started thinking: what if I could build one of the tools I kept reaching for? Or make one I felt would help me more?
I’ve also always wanted to dip my toes into DSP, and I wanted to learn it by building a real signal processor, one useful enough to put on my own music, instead of watching plugin-development videos forever.
So I built BQST on my own: a free JUCE VST3/AU/Standalone plugin for producers who want broad, subtle tone shaping on a mix bus or master. It has custom DSP, a hand-designed GUI, automatable parameters, presets, oversampling, pluginval validation, and a signed macOS installer. It sits right at the intersection of practically all the things I’m into: programming, music production, audio engineering, DSP, and product design.
what is it?
The name is short for Baxandall EQ and Saturation. The idea was simple: a broad tone-shaping equalizer feeding a tasteful harmonic generator.
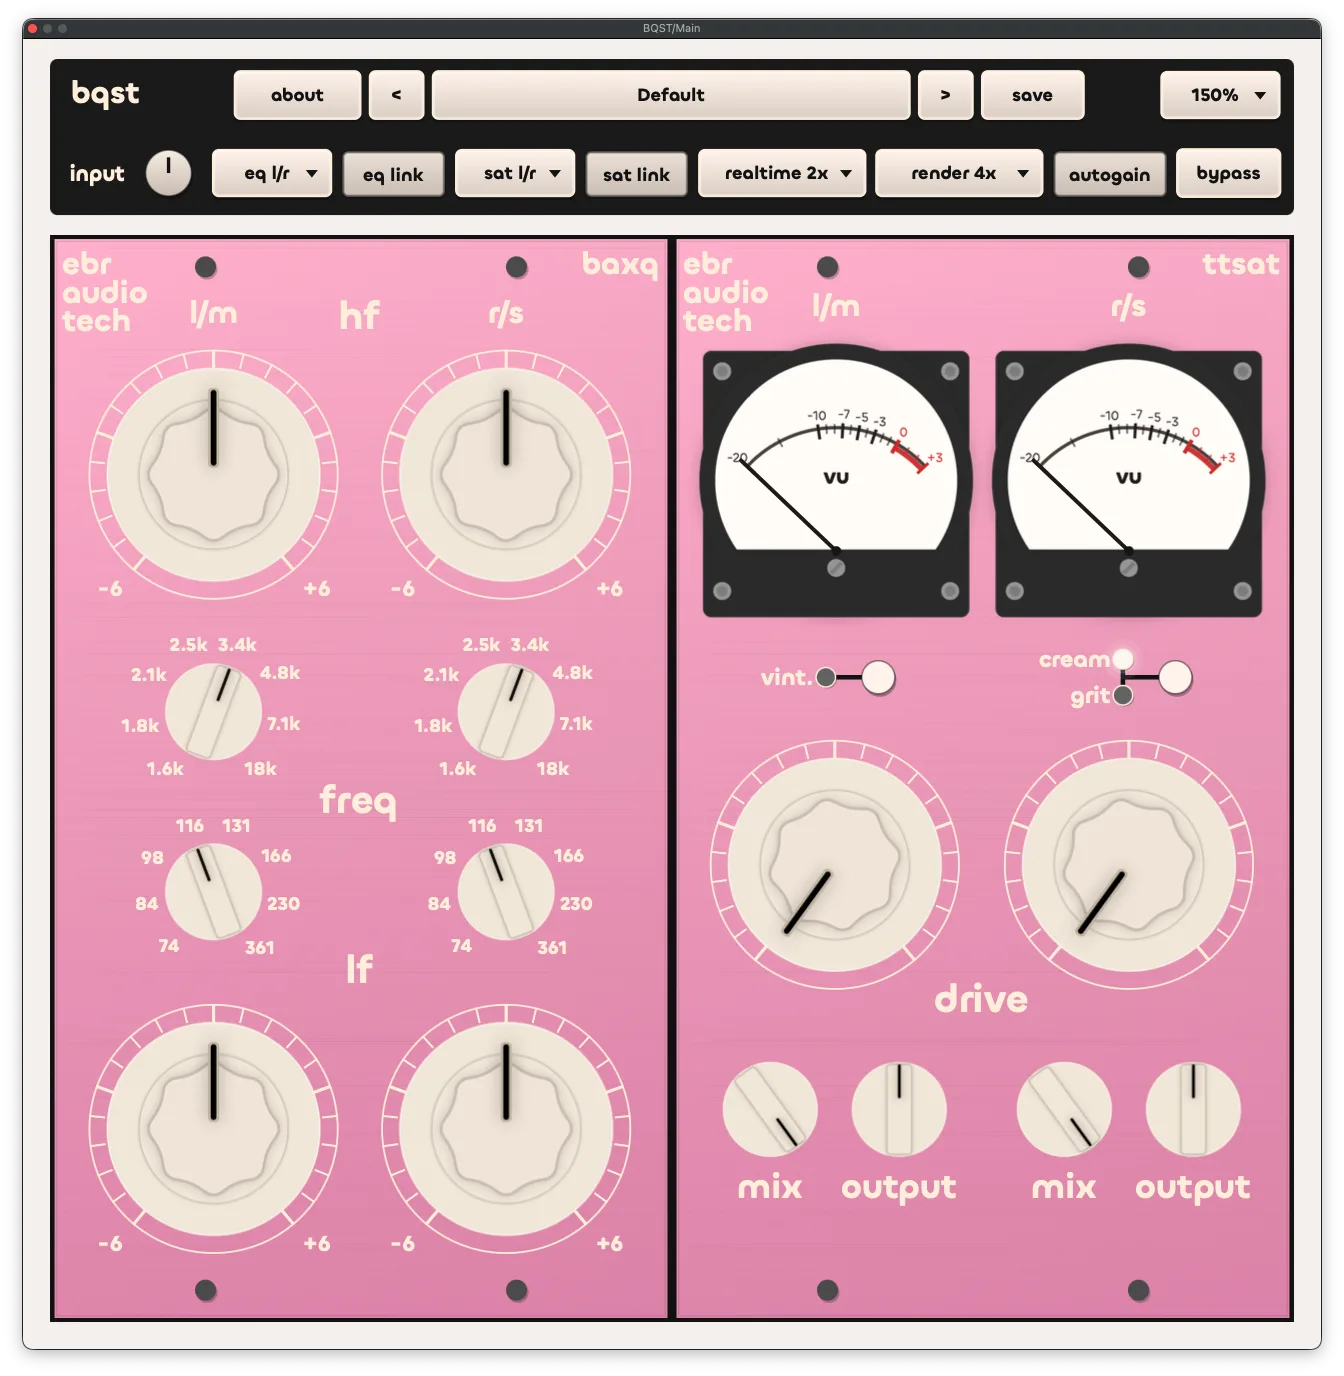
An equalizer, or an EQ, boosts or cuts parts of the frequency spectrum of a signal. In music, that means adding an airy sheen to a vocal, reducing the harshness of a cymbal, or giving a kick drum more sub bass weight. The EQ module is the left half.
A harmonic generator is a little less straightforward. When you drive analog gear like tape machines, tubes, op-amps, or transformers, as well as making the sound louder, they add new frequencies related to it. Those added frequencies are called harmonics. In the right amount, they can make audio feel thicker, warmer, brighter, or more expensive. Too much, and it just becomes distortion. BQST’s saturation stage is my attempt at walking that line, with two algorithms: one that makes signals sound full and dense, and one that is a little aggressive and edgy. The saturation module is the right half.
The signed and notarized universal macOS installer supports Apple Silicon and Intel Macs and includes VST3 and Audio Unit formats. It is macOS only for now. The source code is available at github.com/rohanz/bqst.
BQST is free to download. If it’s useful to you and you want to support future development, you can buy me a coffee.
Before getting into the sound design, there was one engineering constraint that shaped the whole project: this had to run safely inside a DAW.
realtime constraints
A plugin’s processBlock runs on a high-priority audio thread that the DAW calls every few milliseconds with a buffer to fill. Miss that deadline and the user hears a click or a dropout; there is no retry button. That makes the audio callback a real-time context: no locks that might stall the thread, no file or network I/O, and no per-sample allocations in the hot path. BQST reads host parameters through JUCE’s AudioProcessorValueTreeState, smooths gain, mix, and bypass changes, and only recalculates filter coefficients while a smoothed value is still moving, so automation does not zipper. It also uses juce::ScopedNoDenormals in processBlock to avoid CPU slowdowns from subnormal floating-point values. The GUI thread handles presets, file access, and drawing; the audio thread only does the work needed to produce the next block of samples.
Hosts don’t always send the block size they promised, either. When a DAW sends a block larger than the plugin prepared for, BQST splits it into smaller ones, so the oversampler never writes past the end of its buffer and the audio thread never has to allocate. The same discipline shows up in game engines, embedded firmware, and low-latency networking: anywhere a callback has a deadline it cannot miss.
Let’s start with the left half: the EQ module.
bax eq design
A Baxandall-style EQ is built for broad tone moves: making a mix feel brighter, darker, heavier, or lighter without sounding obviously “EQ’d.”
Each side has a low shelf and high shelf with +/-6 dB of gain. The shelf frequency selectors are stepped:
- Low shelf: 74, 84, 98, 116, 131, 166, 230, 361 Hz
- High shelf: 1.6, 1.8, 2.1, 2.5, 3.4, 4.8, 7.1, 18 kHz
The graph below shows all of those stepped shelf positions across the audible range.
The shelves are IIR filters with a deliberately low Q around 0.38, closer to classic tone-control behavior than a modern parametric shelf.
Under the hood, each shelf is a biquad coefficient set. During a gain move, the gain value is smoothed sample-by-sample, and the coefficients are recalculated only while that smoother is still moving toward its target. Once the knob has settled, the filter reuses the same coefficient set. That keeps automation from zippering without recalculating coefficients when nothing is changing.
The coefficients are my own design. The standard digital shelf recipe (the RBJ cookbook) squeezes the whole curve below the Nyquist limit (half the sample rate), so the high shelf would measure differently at 44.1 kHz than at an oversampled rate, and a render at 4x would not match playback at 2x. Instead, each biquad is fitted to the analog shelf’s response, matching its level exactly at the bottom and top of the spectrum and at one point in between. Across all 16 shelf positions, four sample rates and the full +/-6 dB range, the worst error against the analog curve is 0.24 dB, down from 1.21 dB with the cookbook design. The EQ also runs at the host rate, before the oversampler, so its curve no longer depends on the oversampling setting at all.
The right half of BQST is trickier, because saturation is less about a perfect-looking curve and more about how the algorithm behaves when real audio hits it.
saturation design
The saturation side was the most subjective part of the plugin. An EQ curve can mostly be judged by looking at it, but saturation has to be judged by how it reacts to real audio. A curve that looks smooth on a graph can still sound brittle on a kick drum, dull on a vocal, or too obvious across a full mix.
I started by designing the two modes around different use cases. Cream was meant to be the smoother, denser mode: saturation that makes a signal feel thicker without immediately announcing itself as distortion. Grit was meant to be firmer and more transformer-like, with more edge and forwardness, but still usable outside of special-effect settings. The names describe how each mode sounds rather than the circuit it imitates, because that is how I actually think when reaching for a processor during a mix.
The early versions exposed the usual problems with saturation quickly. Loud kick drums and 808s could push the algorithm into a harsh high-frequency buzz, and the more aggressive mode could make the upper mids feel too crunchy and forward. That was useful feedback: the problem sat in the whole signal path, as well as in the waveshaper curve itself.
The fix was to treat saturation as a small system. The transfer curve still matters, but it sits inside a chain: low-end control before the nonlinear stage, a carefully shaped soft-clipping function, tone shaping after saturation, and static autogain calibrated against different kinds of material. That chain is what made the algorithms usable on real mixes.
The graph below isolates the waveshaping part of that chain: it sweeps an input level and plots what comes out, for both Cream and Grit. Click and drag upward on the Drive knob to see how the curves bend as the algorithms are pushed harder.
As the drive increases, the straight dry signal starts to bend. That bend is the whole point: the peaks are rounded instead of chopped flat, which is what creates the extra harmonic content without immediately sounding like hard clipping. The two modes bend differently. Cream stays a straight line through the middle and only rounds what is near the top, so quiet material passes through almost untouched. Grit pushes the whole signal harder into its curve, so it colours more of the signal at the same Drive setting. For Grit, the curve drawn is its waveshaper, the larger of its two algorithms. The other one, covered below, has memory, so it has no single curve to draw.
The two algorithms, cream and grit, both use soft nonlinear transfer curves, but the surrounding tone network is different.
saturation algorithms
cream
Cream is the mode I reach for on a mix bus, and it is built from measurement rather than by ear. It is fitted to before/after recordings of a boutique analog unit known for exactly this kind of density: the same audio with the unit bypassed, then engaged at several settings. The model was fitted on part of each recording and scored on the rest, and blind listening rounds against the hardware recordings decided between the closest candidates.
The result is a small chain. Its curve, tone shaping and gains all came out of the fit:
The tone shaping and the DC blocker fade in with drive, reaching full strength at 6 dB, so a tiny Drive setting stays transparent instead of switching a tilt on. The plugin’s C++ model is tested against the Python reference sample for sample, to within a billionth of the signal level.
The chart below shows how close it gets. It plots Cream against the hardware across the spectrum at 14.2 dB of drive, the one recording with nothing else engaged on the unit, measured only on the part of it the fit never saw. Flip between saturation and tone. Saturation shows how much new harmonic content each part of the spectrum gets. Tone shows how the level at each frequency shifts against the dry input, in tenths of a dB.
The tone curves stay within a third of a dB of each other from 40 Hz to 12.7 kHz, and the saturation curves within 2 dB (typically 0.3 dB), with Cream slightly heavier in the bass. Lighter settings are less exact: in a 9.3 dB recording, made with the unit’s Vintage filter on, the tone still tracks within 0.2 dB, but Cream runs up to 2.7 dB lighter from the upper mids through the presence range, so at low settings it is a little more polite than the real thing.
grit
Grit is the firmer, more forward mode: more low-mid weight and a little edge and bite. It is a blend of two algorithms running side by side.
The first is a waveshaper. It uses:
- a firmer tanh transfer curve
- a small bias term
- low and low-mid weighting before saturation
- partial low-end restore and mild top rounding after saturation
- the same low-end guard structure
That pre/post tone path is what makes it feel less like a generic clipper. The low and low-mid content pushes into the nonlinear stage a little harder, then some of that tonal tilt is restored afterward, leaving more transformer-like weight without simply EQ-boosting the final signal.
The second comes from measurement, like Cream. I recorded a boutique hardware compressor set up so it does no gain reduction, which leaves mainly the sound of its output transformer, at its lowest makeup gain and at three higher settings. Then I fitted a model to tones recorded through it: seven filtered odd-harmonic shaping curves, four low-frequency nonlinear paths, and an output knee for the way it limits when pushed. On drum loops the fit never saw, it brought the difference from the hardware down to about -21 dB, against -12 to -14 dB for the unprocessed signal: close, but not a clone.
The two run independently and only meet at the end:
The harmonic fingerprint graph below runs a sine tone through both modes as the plugin runs them, and shows how strong each resulting harmonic is. Lower harmonics tend to read as thickness or warmth; stronger upper harmonics can read as edge or bite. Cream is mostly odd harmonics (3rd, 5th, 7th), from its symmetric soft knee. Grit adds more of everything: its odd harmonics stay strong much further up the series, and it carries more even harmonics too.
Turn the Drive knob to see the balance shift between gentle density and obvious saturation. Then push Drive to 18 dB and slide the test tone down towards 40 Hz: Cream’s 2nd harmonic climbs by about 16 dB as its low-end even path kicks in, while Grit’s barely moves.
Humans often perceive louder music as better music, which makes drive controls easy to misjudge. If a saturation stage gets louder as it gets pushed, it can feel like an improvement even when the main change is just extra volume. BQST has autogain enabled by default to make that comparison fairer. Instead of chasing the signal level live, it uses static compensation calibrated offline against sine tones, bass, drums, and full mixes near commercial loudness, applied to the wet path before the Mix control, so turning up Drive changes the tone more than the loudness.
Both modes are calibrated the same way, on the built plugin: one value per half dB of Drive, set so the median loudness change across the calibration material is exactly zero.
The table shows the result in dB of gain compensation. Grit gets louder as it saturates, so it is turned down. Cream does the opposite: rounding peaks costs it a little loudness, so it is turned up slightly. No static curve can match every source, so the goal was to keep the comparison fair without adding a live level detector into the audio path, not to promise an exact loudness match. For Grit, the musical material lands within about 1.6 LU at every setting, while a pure sine ends up as much as 3.8 LU louder at full Drive.
| Drive | Cream Compensation | Grit Compensation |
|---|---|---|
| 3 dB | +0.4 dB | -1.6 dB |
| 6 dB | +0.7 dB | -3.5 dB |
| 12 dB | +1.7 dB | -7.6 dB |
| 18 dB | +3.7 dB | -10.6 dB |
That brings up another problem with nonlinear audio processing: once a plugin creates new harmonic content, it also has to decide what to do with harmonics that land above the host’s normal sample-rate limit. The fix is a process known as oversampling.
oversampling
Oversampling is one of those words that sounds more complicated than the basic idea. BQST temporarily processes audio at a higher internal sample rate, up to 8x, using JUCE’s dsp::Oversampling with half-band polyphase IIR filters, then brings it back down to the host’s normal rate.
This matters especially in saturation. A nonlinear curve creates new harmonics above the original signal. If those harmonics go past the host sample rate’s Nyquist limit, they can fold back into the audible range as aliasing. That foldback sounds like unrelated high-frequency dirt, nothing like analog saturation.
The chart below shows it with a single 6 kHz tone. Its harmonics keep going past the 22 kHz line, and without oversampling each one folds back into the audible band, mirrored around that line: energy at frequencies the original sound never had. Switch to 4× to see them stay put.
Oversampling gives those new harmonics more room to exist before the anti-alias filter removes them. BQST offers 2x, 4x and 8x, set separately for realtime playback and for renders.
demo
Finally, let’s actually listen to it. The player below has the same drum loop in three versions: one clean, with no processing, and two processed through BQST, one with each saturation mode. Headphones or monitors are ideal here, because the changes are more about weight, transient shape, and tone. Both processed versions use a +2.2 dB high-shelf boost at 2.1 kHz and a +1.7 dB low-shelf boost at 116 Hz, with Cream Drive at 9.7 dB or Grit Drive at 11.5 dB. Press play, then flip between clean, cream and grit while it is playing. Listen for added thickness and a touch more edge on the transients, even though the peaks come out lower after processing: -1.7 dBFS clean, -3.8 dBFS through Cream and -4.2 dBFS through Grit.
The meters beside the player read the audio you are hearing, with BQST’s own ballistics (0 VU at -18 dBFS). They go dark while the clean take plays, as if the plugin were bypassed.
taste matters
The first working version of BQST already had the core idea: EQ, saturation, oversampling controls, meters, and left/right processing. But it looked like a prototype. A lot of the final work went into making it feel like a real audio tool, with very little new DSP.
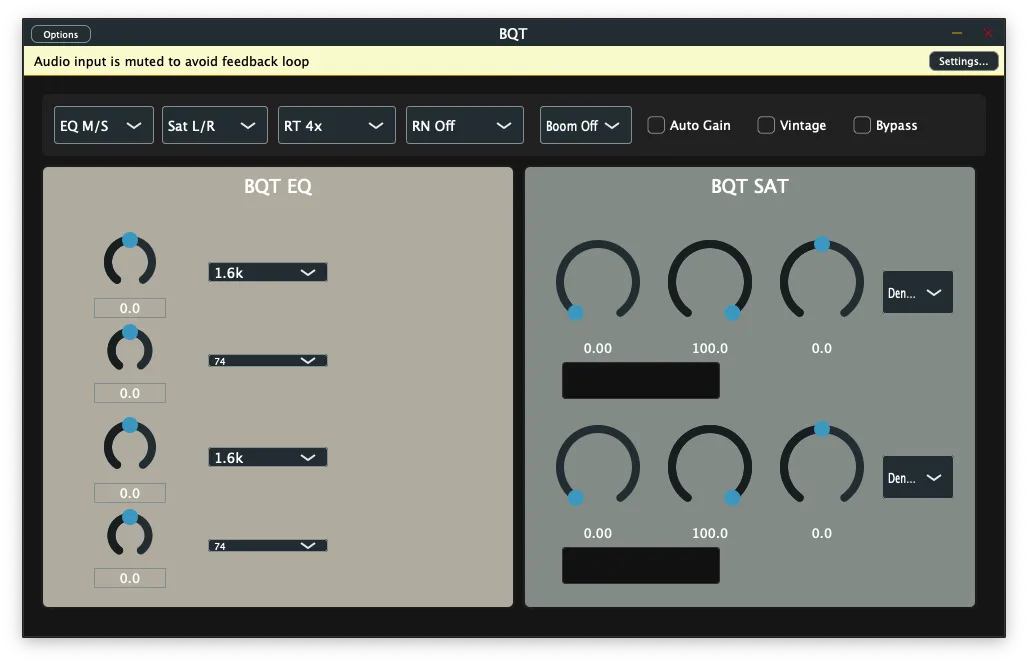
It worked, but visually, it left a lot to be desired.
I started designing all the assets myself. I wanted the plugin to borrow from the timeless, familiar language of analog hardware: big cream knobs, physical markings, screws, VU meters, and textured anodized faceplates, but I also wanted it to feel modern. So I kept the shapes simple, the shadows restrained, and the layout minimal. Those choices make the interface inviting but readable. The VU meters also do a job: they give a slower, more musical sense of level than a twitchy digital peak meter, calibrated so 0 VU sits at -18 dBFS. Their faces are lit like real backlit meters: off-white paper, brightest just above the bottom bar where the bulb would sit, with the scale numbers centred on their ticks.
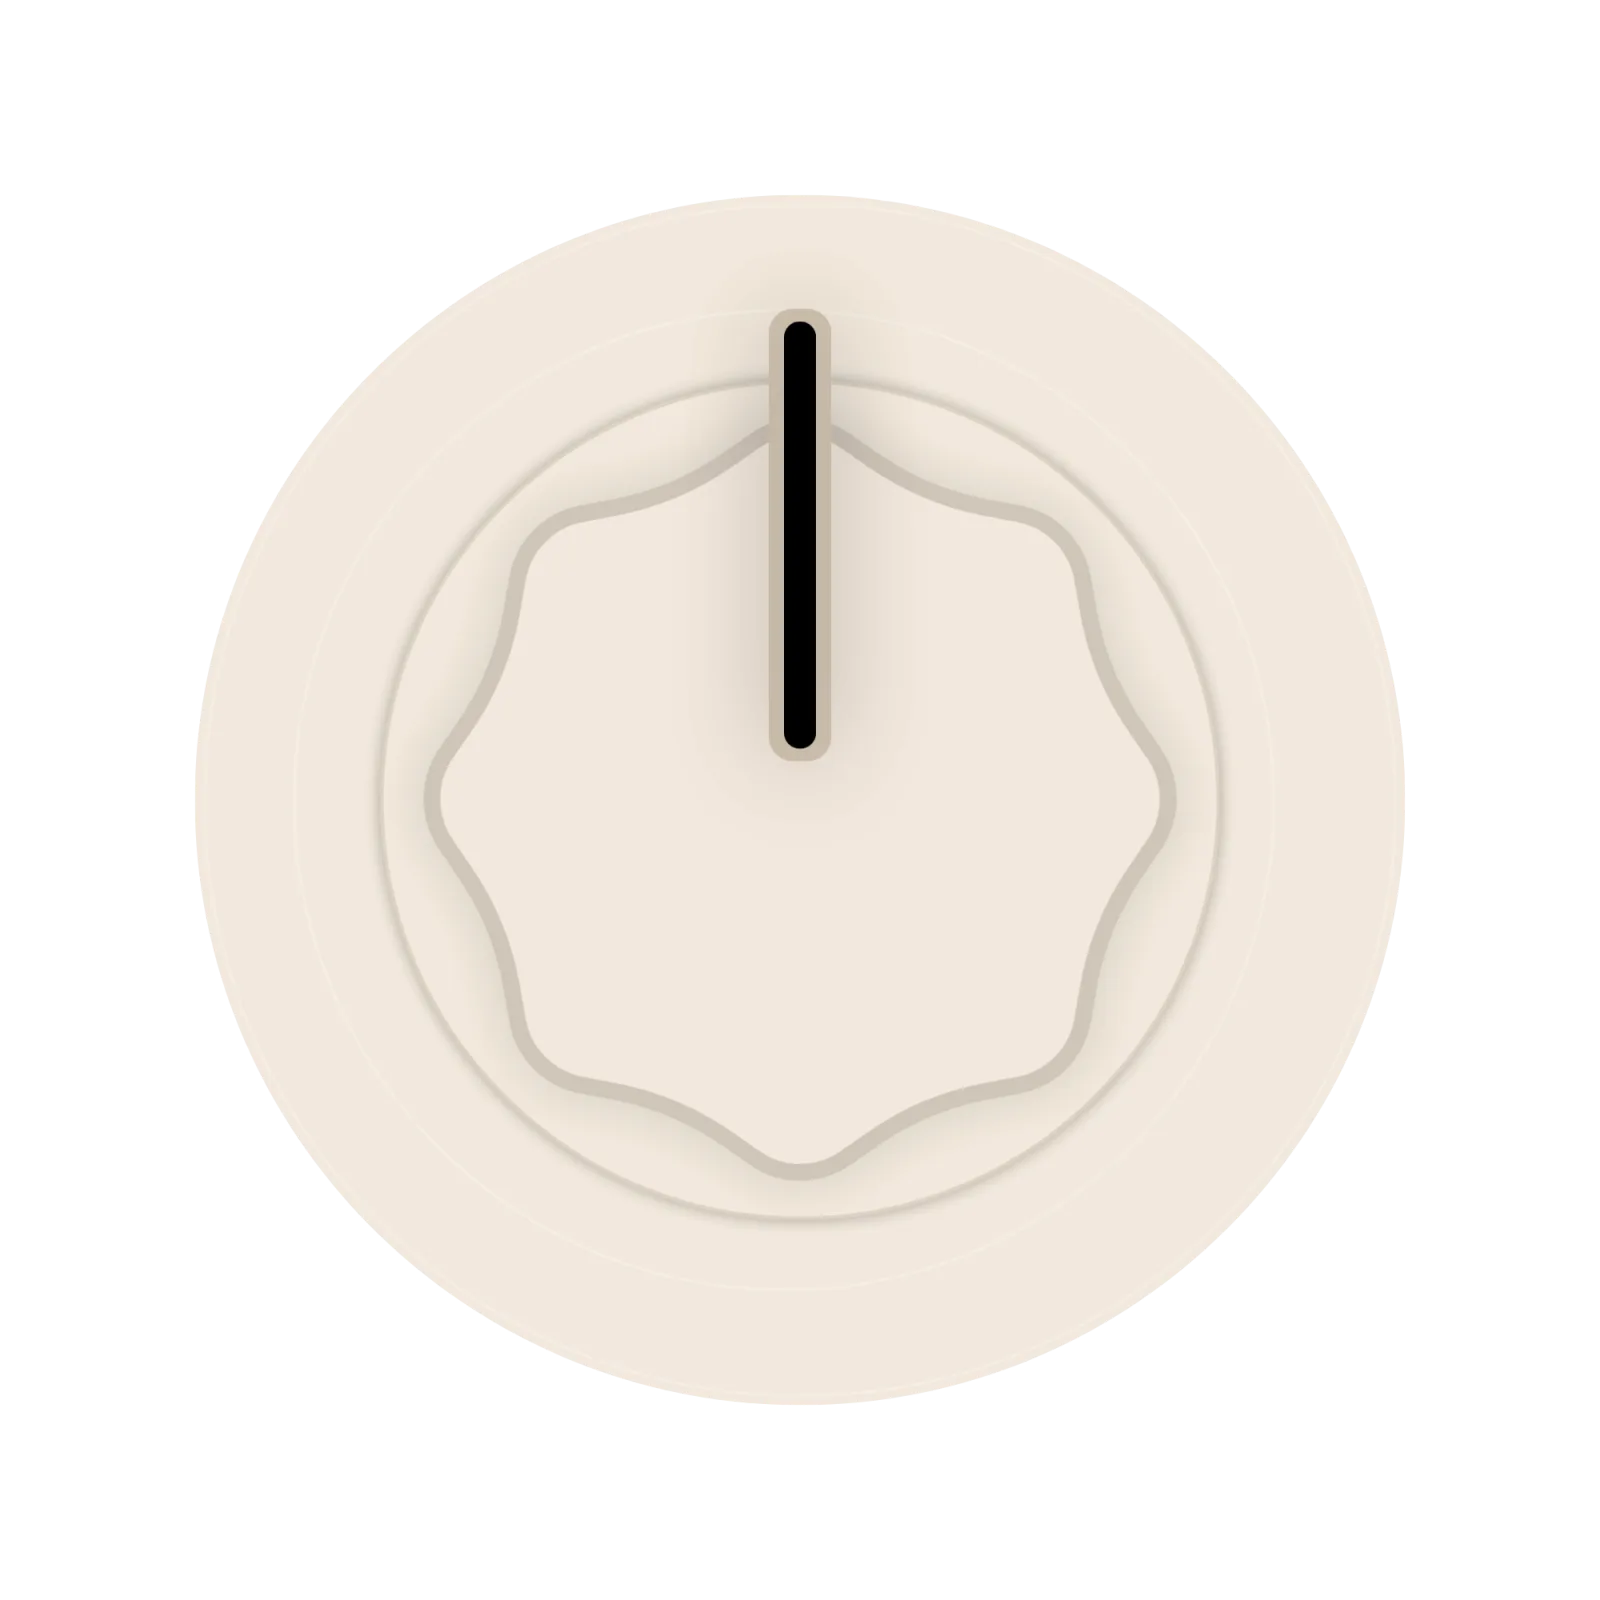 large gain knob
 selector knob
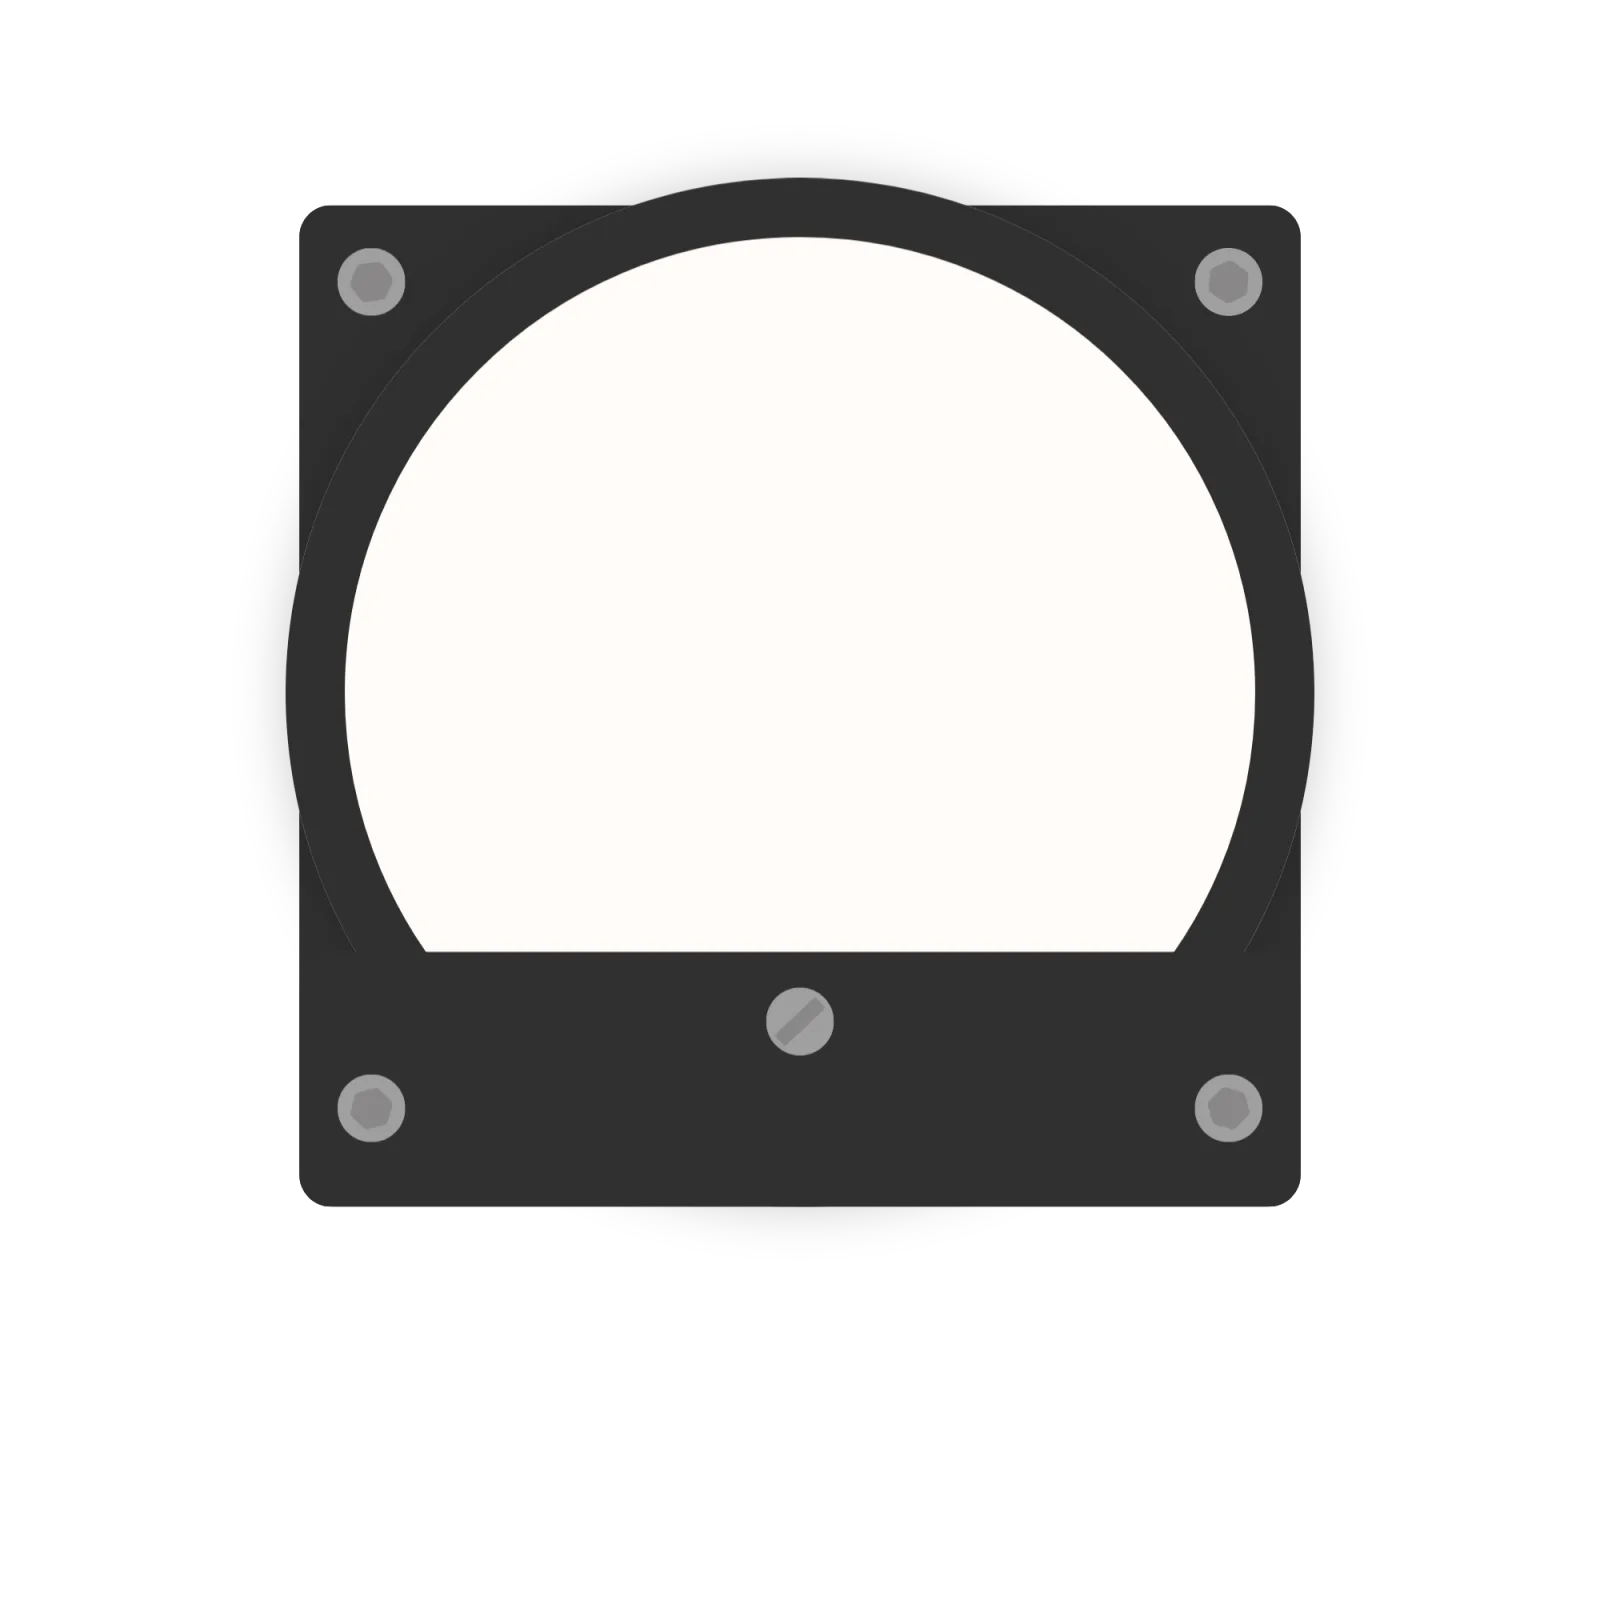 vu meter
I didn’t want to copy analog design just for the sake of it, though. The design philosophy became: keep the familiarity of analog hardware, but use digital where it improves the workflow. Mid/side processing is rare in analog gear, and having it independently available per module is even rarer. In BQST, the EQ can run in M/S while the saturation stays in L/R, or the other way around, because digital routing makes that flexibility practical.
The workflow was designed around user convenience in the same way. Realtime and render oversampling are separated because those moments have different priorities: while tracking or writing, low latency matters more, so the plugin can run lighter; during export, latency no longer matters, so it can switch to higher-quality oversampling. By default that means 2x while playing and 4x for renders. Presets, undo, tooltips, and linked left/right controls come from the same thinking. None of them are flashy. They are what makes the plugin feel like a tool that stays out of the way.
Designing BQST became a bigger lesson about software in general. A product can be technically functional and still feel unfinished. The details are what make people trust it: how it looks, how it responds, how predictable it feels, and whether it disappears into the workflow. BQST is vintage in its references, modern in its minimalism, and direct in use: it presents familiar controls, handles levels, latency, and routing in the background, and still leaves the important decisions easy to tweak.
what stuck with me
Domain knowledge is a superpower. I hadn’t built an audio plugin before, but I’ve been using plugins for years. I knew what a useful plugin should feel like: the controls it needed, the pitfalls to avoid, the workflow problems to solve, and the difference between a cool demo and something I would actually put on a mix. That made the engineering loop much sharper, because I could listen to a bug, describe it precisely, and decide whether a code change actually fixed the musical problem.
DSP is both math and ergonomics. A saturation curve can look reasonable in isolation and still feel wrong on a kick drum. The final sound came from combining nonlinear transfer functions with filtering, autogain, oversampling, and careful parameter ranges.
Using AI well is an engineering skill. Codex was useful because I could give it precise constraints, inspect the result, test it in context, and redirect it when the output was wrong. I used it to move quickly through unfamiliar JUCE scaffolding, parameter wiring, and editor plumbing. The important part was steering the loop: describing audio bugs clearly, asking for architectural changes, checking the code paths, and validating behavior in Ableton. The prompts were one step in a loop of implementation, listening, measurement, correction, and validation, and I ran every step of it.
Production readiness is a system problem. The plugin wasn’t “done” when it made sound. It needed automation names, undo behavior, presets, AU/VST3 validation, signing, install paths, latency handling, and DAW testing. The VST3 and AU builds pass pluginval at strictness level 10, chain-level tests run the whole processing chain in CI, and in Ableton I checked both builds for state recall, automation, bypass behavior, sample-rate changes, buffer-size changes, fixed UI sizes, and offline render settings.